Dodge Caravan 3rd gen manual conversion
Last Updated on April 8, 2024 by Mutiara
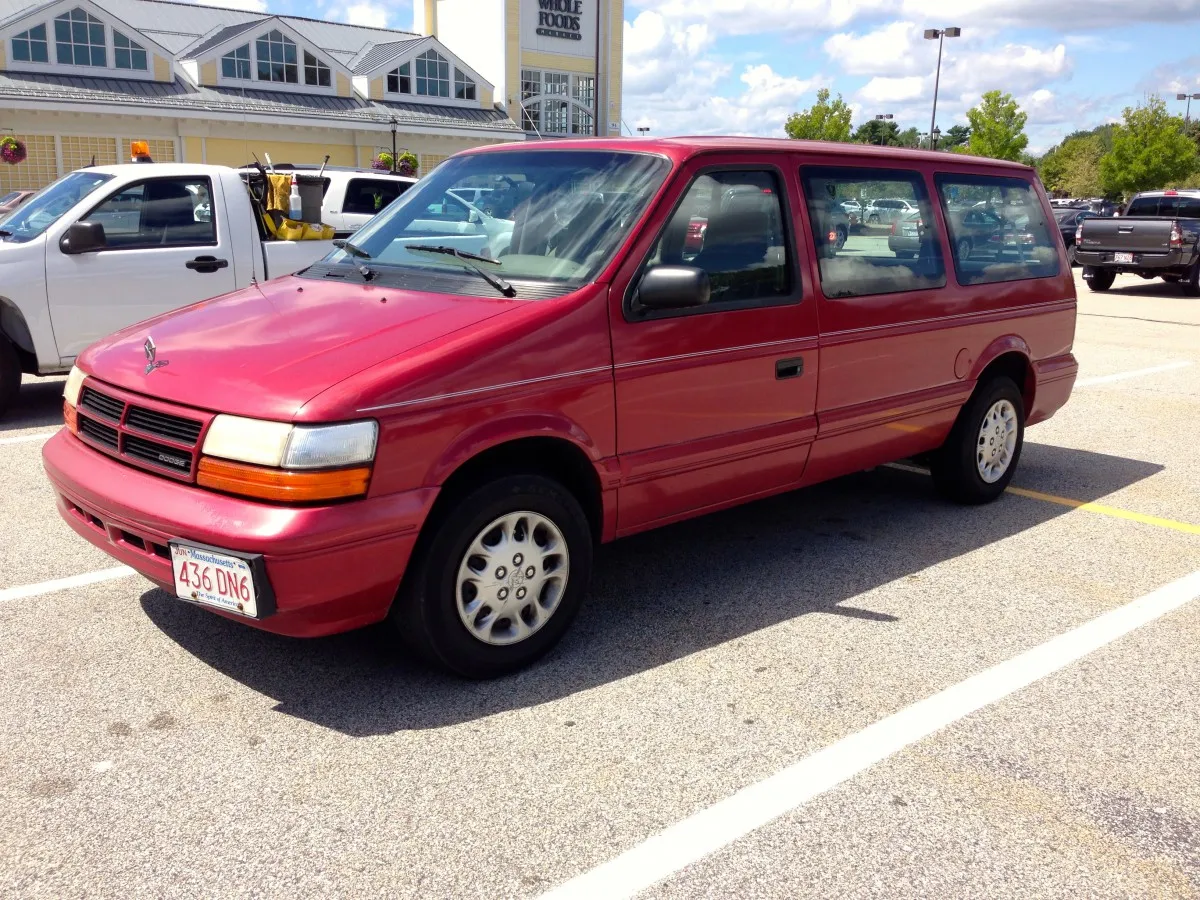
While there were first and second generation Dodge Caravan minivans that came with a manual transmission, the third generation never did. However certain versions of it are easier to convert than most people think. The third generation Dodge Caravans sometimes came with a 2.4 L engine that was also used in the neons, pt cruisers, SRT-4s (in a highly modified form), and other Chrysler, Dodge, and Plymouth vehicles. The engine is quite reliable, built with simplicity in mind, and is generally quite easy to work with. However it is a bit under powered to haul around a 3500lb minivan. The slow shifting and extremely troublesome A604 transmission does not help.
Once the van was purchased brand new, the transmission failed at 12,000 miles. The dealership replaced it under warranty, and then the transmission failed again at 80,000 miles. Then a used one was put in by a transmission shop, and then it failed again at 90,000 miles. The last failure was due to the way the transmission cooler was built in to the radiator rather than a standalone unit. Eventually the radiator rusted through inside and both the cooland and transmission mixed together. Being frustrated with the loss of power, slow shifting, and constant failure, it was decided to attempt a manual conversion. Since the 2.4 L engine shares the same bellhousing pattern as the 2.0 L engines found in Dodge Neons, it was decided that would be the best vehicle to obtain one from due to their availability in auto salvage yards. The clutch is the same as well. Here are the steps that had to be carried out in order to convert the minivan into a manual. Keep in mind that all conversion parts came from a Dodge Neon.

Axles: Because the Dodge Caravan has a wider wheel base, the axle length is different when compared to a neon. However the splines and connections are identical, even to the automatic. The driver side axle, being the short one, was able to be reused. However the passenger side axle was cut, a sleeve put over it, and welded. This is due to the manual transmission being slightly narrower around the differential area in the back, compared to an automatic. At first this stirred up a lot of controversy over the possibility of damaging the transmission due to having an unbalanced axle, even though the sleeve that was used was as tight as possibly can be and ensured a perfect match between the two cut up sections of the axle. The metal tube which was used for the sleve was purchased from Alro metals, and was about 1/4″ thick. Eventually it was decided to have a professional shop extend the axle, which was hard to find because most driveshaft and axle shops didn’t want to do anything custom. Eventually a shop was found, “Dependable Driveshaft” out of Tampa, FL. However this actually didn’t make any differences over the home made extension, and was later deemed a waste of money.

Shifter: Fortunately since the shifter had cable linkage instead of rod linkage which would have been difficult to route through the van’s unique subframe. Mounting the shifter was very easy, by using two two by fours on top of each other, bolted to the floor, and the shifter mounted on top of them. Since the van seats are much higher this was necessary to reach the shifter. Cutting a small hole in the firewall allowed for the cables to easily go through and reach to and mount on the transmission.
Shifter bushings: Shifter bushings are one of the most problem prone areas in Dodge Neons and any other car that uses the same cable linkage. The bushings were made poorly from the factory with little spokes for dampening, which almost always broke off and resulted in a loose shifter, or disconnecting completely. After checking over 20 manual Dodge Neons in junkyards, it came to the conclusion that new shifter bushings were needed. They could not be obtained from the Dodge Dealership (they should have been a recall actually) for they wanted to sell the whole cable assembly, which would have been about $ 200. Instead it was decided to go online and order performance polyurethane shifter bushings from Booger Bushings. These worked exceptionally well and snapped in perfectly.
Clutch pedal: Surprisingly the clutch pedal assembly actually bolted right up to the firewall with only minor modifications. The cable reached just fine and operated the clutch as it should. It was a good thing that Dodge used cable linkage as hydraulics would have been a lot more of a pain to deal with.
Clutch, flywheel, & throwout bearing: Dodge made a really strange setup that had the pressure plate and flywheel riveted together and therefore changing the clutch or resurfacing the flywheel was not possible. Due to budget constraints the decision was made to keep the used one that came with the transmission, rather than buying all of those parts at once. The throwout bearing was re-used as well, as risky as it would be, since they fail often, this decision turned out to be good. The clutch lasted longer than the short lived project.
Automatic shifter: No longer needed, the automatic shifter was removed from the steering column.
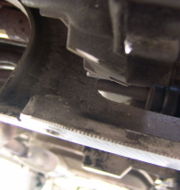
Grinding bellhousing: An unusual modification, the rear bottom corner of the transmission’s bellhousing had to be ground away, since it provided no structural support, however it did sometimes touch the bolt and part of the subframe during harsh acceleration. After this was performed, the two parts never met again.
Electrical: There are two wires that used to go to the automatic transmission, and were part of the safety park switch, that had to be shorted in order to get the car to run and start. Some people would run this to the clutch pedal switch to make sure the car can’t be started without pressing down on the clutch pedal, however if one is confident enough this extra safety measure is not wroth the time.
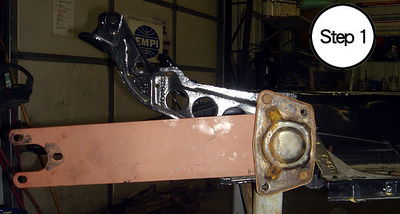
Transmission mounts: The hardest task of the transmission conversion, almost all 3 mounts have to be custom made. The mounting systems on the dodge Caravan and the Neon share no common bolt patterns or bolt locations, so custom ones had to be fabricated out of metal and with the use of a TIG welder. The mounts had to be strong because the manual transmission was pulling a vehicle 1000 lb heavier and would endure more stress than a gently shifting automatic. Though technically for this project the Dodge Caravan was stripped down and had it’s weight reduced to 2800 lb, quite an improvement over the stock 3500 lb.
Pictured below are several images of the custom engine mounts. All of them worked well except that the mount in the front which was made into a very simple and solid design, had the bolt eventually break from stress.


Other modifications

Simple alternator only accessories setup.
Although having little to do with the manual transmission, the same project vehicle endured other modifications.
Accessories: All of the accessories were removed except the alternator. Power steering was eliminated as well by de-powering the rack, and leaving the connections open. Manual steering was not too bad due to the weight reduction of the vehicle.
Interior & exterior: None of the entire interior remained and absolutely everything that could be was discarded. Even the dashboard was dismantled and the only thing remained was the metal bar which supported the steering column. This did a dramatic weight reduction change on the vehicle and made it more suitable for mechanical work. As far as the exterior, the bumper was removed for a while and the hood was discarded as well. This did not cause any problems in Florida, although the bumper cover (without the reinforcement) was later reinstalled because bumpers are a legal requirement on a car. The hood was discarded due to a failed attempt to put in hood pins and eliminate the bulky hood latching mechanism. However with the extreme angle of the hood in a minivan, this did not work out and left a pretty bad hole in the hood, obtaining another one was deemed a waste of money.
Fuel system: The entire pump regulated fuel system was removed in favor of a much simpler 3 gallon fuel cell with an inline Walbro fuel pump and fuel filter. Because the system pressure was previously regulated by the pump itself, and Aeromotive fuel pressure regulator had to be installed regulate the pressure at around 45 psi. The fuel rail was fairly simple to convert and required no real modifications, simply because the test port was drilled out and a brass fitting screwed right over it which fed into the regulator. One of the electrical wires which fed into the pump in the back was rerouted to the front and connected to the Walbro fuel pump.


Exhaust: The entire exhaust system was cut off beneath the passenger seat, and a muffler was installed, making it an extremely short exhaust system. While having only one muffler made it quite loud, it was bearable. Later another experiment was done, a flange was welded to the muffler and the muffler was bolted on directly to the exhaust manifold. This did not make the noise any worse, however eventually from all the rocking that the engine has done, the pipe that went into the muffler had no more welds to hold it and the entire muffler body fell off while driving, leaving only a short pipe in place. This setup was kept for the duration of the vehicle, and while ear plugs had to be used on the highway it was quite entertaining around town. Surprisingly for a 4 cylinder it had a nice rumble and would often make non mechanically inclined people assume it was a v8.

Oil drain valve with handle attached.
Oil pan valve: One of the more amusing mods done to the vehicle, at one point the bolt threads for the oil drain were stripped so the only thing available at the time to fix it was a valve from a compressor. Even that didn’t thread in too well despite using good quality pipe taps. Some epoxy putty around it helped reinforce it, and thus the quick yet quite jerry rigged oil drain system was born. The handle was usually removed for driving so it wouldn’t get ripped off if the van ever went over a curb. There were never any leaks and oil changes were a breeze.
Intake: The entire intake was removed and a 2.5″ I.D. conical air filter from Fujita was installed right on the throttle body. Quite a loud vacuum cleaner noise started coming out of the throttle body, unlike any other car, due to the strange Dodge intake manifold design and the effects from the engine. Fortunately the Dodge 2.4 engine uses a M.A.P. sensor attached to the intake manifold by the first cylinder to calculate air intake and so there were no M.A.F. sensors to complicate or prevent this modification. The Fujita filter was chosen because it was an inverted cone inside to prevent air turbulence in the filter.
Aesthetics: Painting the intake manifold red along with a few other parts, while painting the rest of the engine bay interior black really made a nice difference, especially since the van was driven without a hood and the engine was exposed at all times.
Porting: The intake manifold was just slightly ported cleaned out and polished inside, without consuming too much time and going all the way.
Balance shafts: One of the best and easiest ways to free up parasitic losses in an engine, and next to free, is removal of the balance shafts. This freed up some good power and weight from the engine, however it did increase oil capacity by quite a lot.
- Misc images


Painted intake manifold & filter.

Exhaust, phase 1.

Fuel rail modification.


Everything re-assembled.


Where did it all go in the end?
The 1.6 L 3 cylinder turbocharged EcoBoost engine is an upcoming design in a number of Ford vehicles wearing the Read more
Common Ford power steering issues Ford power steering pump with reservoir. The power steering system commonly found on most Ford Read more
The Ford MTX-75 (Manual TransaXle), is a 5-speed transmission developed by Ford Motor Company for its larger engined front wheel drive models. "75" refers to Read more
This page contains some modifications that were done to a Ford Windstar with a 3.8 Ford Essex engine for amusement. Read more
While the van was amazingly fun to drive, do burnouts in, and see the look on people’s faces when it’s just a Dodge Caravan, eventually it had to be scrapped. As far as it’s known nobody has converted any other third generation minivans, however another one exists in the Sarasota area, made by me as well for a friend who went through too many automatics and just couldn’t take it. Although not used for anything but work, it functions well and continues to serve without an end anywhere near in sight. This should be a lesson to automotive manufacturers. Also, this van had a pretty decent pickup, climbing up to 60 mph was very quick however top speed was terrible due to the aerodynamics problems with the vehicle. The van would easily out accelerate almost any stock 4 cylinder naturally aspirated sedan. Mostly due to the weight reduction, the total weight of the van in the end was 2800 lb!