Aerocatch hoodpins
Last Updated on July 22, 2024 by Mutiara

An alternative to normal hood pins, the Aerocatch hoodpins provide a flush design, to avoid taking away fro the flush finish of carbon fiber hoods. While flaws in some respects, they are overall worth it in terms of aesthetics. The pins are also paintable and allow for perfect blending with the rest of the car. The latching mechanisms are solid and made from a 50% glass fiber reinforced thermoplastic semi-crystalline material, to allow for greater chemical & temperature resistance.
Mounting instructions

Included in a typical kit are 2 AeroCatches latches, stud strikers, rubber bump stops (sometimes missing, use a thick vacuum hose instead), installation fasteners, and a cutout template.
The hoodpins unlock when the crescent shaped secondary lock button is depressed, and the handle will pop open by about 10°. During which the latch mechanism is still locked. This is called free travel and allows one to grab a hold of the handle to open the latch. This action pulls the shear pin clear of the stud strike.
Now this is where things start to deviate from the manufacturer’s overhyped claims about flawless space age designs. Supposedly to close, the the handle should be pushed down until it engages the secondary lock button. Not so. Sometimes it will not close no matter how much pressure given, brand new out of the box, without any dirt or variables to effect it’s original intended performance. To get the pins inside to finally become unstuck requires sharp jabs until it finally moves and does as intended. After a while, this will weaken the hood pins, or become harder to get unstuck, until one day the owner is going to break the plastic pins that hold the major latch. Then operation becomes a hassle, as the hood pins will still lock and hold the hood but using a screw driver to pop them open each time is an embarrassment in front of other drivers. They will no longer be perfectly flush with the hood either, and stick out by 1-2 mm in the back. It is not known how frequent this occurs, however the fact remains from first hand experience about the existence of this defect.
WARNING! Testing the unit for ease of operation is a must before proceeding to cut the holes in a hood. If the hood pin mechanism even hesitates the slightest bit, they should be returned before irreversible modifications to the hood are performed!! Unless big holes in the hood and lack of locking function, or using screwdrivers to open the hood are attractive possibilities to the owner, this warning should not be ignored!

There are two options in marking out the panel cut-out. Either with the use of the included cut-outs or the dimensions show on the installation drawings. The cut-outs are different for the two styles. The included cut-outs are sized for the 120 Plus Flush Series, if the 125 Flush Series are used then a line will have to be drawn that sits inside the cut-out by 0.4 mm.
- Lay the cardboard packaging sheet out flat, you will see two sets of cross hairs on the perimeter of the cut out, these determine the center of the stud strike for the AeroCatch.
- Check that there is sufficient room below the hood line and that it is not in an area with an excessive radius (sometimes the effect of the radius can be reduced by angling the AeroCatch relative to the axis of the car).
- Place the template onto the hood with the narrow end facing towards the front of the car.
- Using a straight edge or similar line up the cross hairs onto the center of the proposed stud strike position on the hood, this will give you the correct position of the AeroCatch cut-out.
- Now mark around the cut-out, remove the template and cut as required, if you are fitting the 125 Flush Series remember to draw a line 0.4 mm inside the template.
- Place the AeroCatch in position and mark the fixing holes. Alternatively use the dimensions on the installation drawings using the position of the stud strike as the datum point.

For optimum performance the stud should be perpendicular to the hood pins, however there is a ± 5° tolerance to allow for any misalignment.
AeroCatch will take up a small radius on the hood but you may wish to fare around it with silicone in tighter radius areas. Do not distort the housing when fixing, as this will adversely affect its operation and performance.
The 125 Flush Series is designed to give a flush finish in panels up to 2.5 mm in thickness. When using thinner panels it will be necessary to pack it out accordingly. It is not recommended fixing the latch with countersunk bolts, as the pull through resistance will be low, flange head button screws are provided which have a small protrusion on the hood. Alternatively the AeroCatch can be fastened from below the hood either with weld studs or by laying up with a suitable composite material for the application.
Side mounting

This mounting method is unique to the AeroCatch. The same stud is used as for top mounting but it enters the side of the latch enabling panels to be slid onto the mating structure. The same method is used for marking out as for the top mounted system. It is important that the stud and AeroCatch axis are at right angles to ensure smooth operation. Setting up and operation is the same as for top mounting.
Optional Sight Window
The underside of the handle is marked with a suggested cut-out for a sight window that enables you to see that the AeroCatch has engaged the strike stud. This can be drilled and filed out.
Setup & Operation
It is important when setting up the AeroCatch to ensure it sits firmly on the rubber bump stops supplied (sometimes). These are cut to length and slid over the stud strikes. The stud strikes should be installed to a position such that slight pressure has to be applied to the hood when closing it so that the load is kept on the bump stops. The stud strikes should also be set up so that shear pins engage at the top of the slot and slightly compress the bump stops for a proper fit. The bump stops are supplied 40 mm long and can be cut down as required. If they were not included, a thick vacuum hose can be purchased at any auto parts store and used instead.
When adjusting the studs to get the correct fit you can see the engagement of the shear pin in the stud by opening the latch to the free travel position.
Aerocatch Retrofit
AeroCatch can be retrofitted onto existing stud strikes, providing they fit into the aperture. The stud strike that protrudes through the hood will need to be lowered approximately 20 mm from its front position. With conventional hood pins, sufficient clearance below the hood line to accommodate the housing is required. If the existing position does not allow this or is on a radius move the mounting position accordingly. When setting up the AeroCatch aim to have the stud at right angles to the housing however there is a ± 5° tolerance to allow for any misalignment.
Aerocatch Latch Dimensions


Real world crash tests

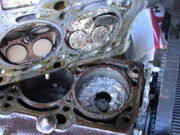
Following an occurance of a car accident in which a Ford Escort with Aerocatch hoodpins and a carbon fiber hood from Deftracing.com was involved, interesting observations about durability and strength were made.
Most evident in this photo, it can be seen that despite the weakness of carbon fiber it was still able to break off pieces of the aerocatch hood pins and take them with it, instead of breaking itself off from the Aerocatch hood pins.

The picture to the left clearly demonstrates that weakness, and raises the concern as to how strong the flush mounts are, and whether they can be trusted at extremely fast speeds. It’s apparent that the flush versions are far weaker than the flush-plus. And if one chooses to use Aerocatch hoodpins for serious racing applications, the flush-plus would make a safer bet. Another thing that can be seen in this photo is how the latch itself sticks out a bit, demonstrating the points made earlier in this article about the manufacturing defects leading eventually to half working hood pins.
The 1.6 L 3 cylinder turbocharged EcoBoost engine is an upcoming design in a number of Ford vehicles wearing the Read more
Common Ford power steering issues Ford power steering pump with reservoir. The power steering system commonly found on most Ford Read more
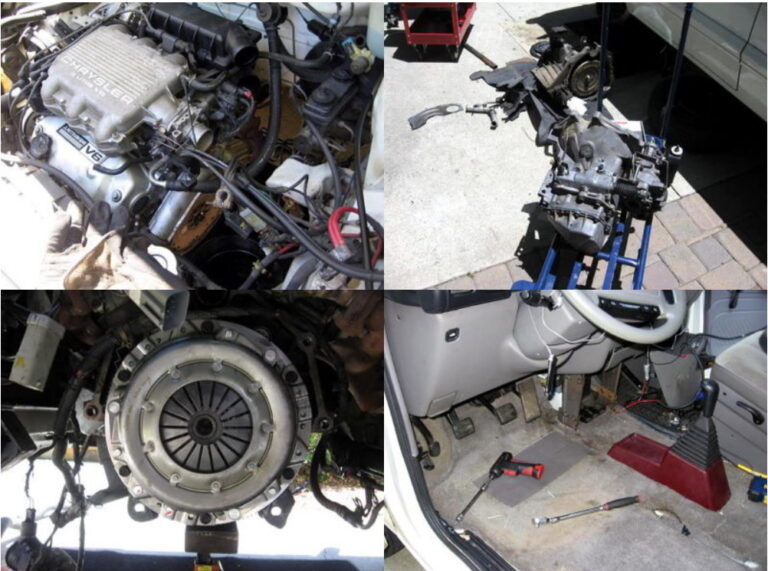
The Ford MTX-75 (Manual TransaXle), is a 5-speed transmission developed by Ford Motor Company for its larger engined front wheel drive models. "75" refers to Read more
This page contains some modifications that were done to a Ford Windstar with a 3.8 Ford Essex engine for amusement. Read more