Unibody welding
Last Updated on July 22, 2024 by Mutiara
A unibody is a one-piece frame and body structure. First, to get some misconceptions out of the way:
- Welding to the unibody is dangerous.
- Yes! This can potentially ruin your vehicle. If done improperly it COULD leave a very week spot that can become prone to cracking. So pay attention!
- Is welding to the unibody unsafe?
- No, if done correctly it can be very strong, or as strong as it will ever be considering its just sheet metal.
- Is welding to the unibody legal?
- In some States / Provinces it is illegal, and if done with out proper inspection could result in your vehicle being un-insurable. So check with your local state and provincial laws! Well, only check if you care, or are planning to build a 100% legal rig.
Their are other methods of fastening to your unibody, such as bolts and self tapping screws.
‘Bolt’s: These are great. You will always know how strong a bolt is. They are easily available. Anyone can install them. The down side is that in the instance of suspension components, or a application subject to high vibration or shock. The nuts can come loose and the holes are start to stretch and over size. Eventually the connection could fail.
Also bolting to a unibody requires some sort of backing plate or sleeve. If you simply stick a bolt through the unibody and tighten it down it will crush the unibody frame rail and eventually separate the frame rail from the floor. If your going to bolt make sure you do it right.
Self Tapping Screws: In some applications these can be an excellent option. Rock sliders, Rock lights, Basically any light duty mounting can utilize self tapping screws. Just do not attempt to remove th screw and then re-use the same hole. The sheet metal becomes stretched and it will never be quite as strong.
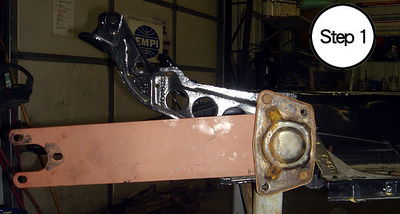
Preparation:
I cannot stress proper preparation enough. First sand the area you’re planning on welding. As a general rule I always sand and area larger then I’m planning on welding to.

Make sure that you have sanded down to bare metal. Jeep galvanizes their unibody’s. If you see any hint of gray un-shiny metal hit is again with a sander. At first glance it may look like you have removed all the surface coatings, but upon closer inspection you may have missed a few spots. Do not use a grinding disc! Grinding disks will remove allot of material and it will be very uneven. I use an 80grit sanding pad.
Once all is sanded, degrease the area with Xylene, or brake clean, or your favorite de-greaser. Make sure it is a brand that does not leave any residue. This will cause porosity in your welds and make them weak.
This guide is broken down into two different styles of welding often required, 10 Gauge (1/8″) or less and 3/16″ plate and greater. These are not anything special. Any certified of experienced welder should know all this. Both methods do not require you to do any sort of weave, or j-hook pattern with your wire as you are welding.
10 gauge or less
Point your wire between the plate you are welding and the unibody. This makes the weld puddle even between the plate and your frame.

I set my Millermatic 250 welder at 19Volts and 275 Inch per minute Wire speed.
Once your ready, flip your mask and pull the trigger. Watch the weld puddle pool up between the frame and the plate. Once it has evenly melted the plate and the frame start to move. You will have to move faster then normal.
When i say “Watch the weld puddle pool up between the frame and the plate” do not sit there for 5 minutes until it melts through the frame. This will happen in a matter of seconds. Pull the trigger and move! Just take not of how it melts together. The worst thing you can have happen is Burn-Through, that is why it is important to move fast. I will discuss Burn-though and how to repair it later.
If done correctly it should look like this.

Notice how the weld is at a nice 45 degree angle. There is an even amount of bead on the frame and the plate.

3/16″ (0.188″) and Greater
The technique is very similar to the 10 gauge plate welding procedure. This time you want to point your wire more at the plate, less at the frame.

Since you are welding a much thicker plate. Your going to want to use that to your advantage.
That being said. Flip your mask and pull the trigger. You will be able to have to time watch the weld pool up on the plate, unlike with the 10 gauge. Wait till the pool has melted the heavy then start to move. Once the plate is melting carefully move you wire closer to the frame, once the bead melts into the frame start to move. The puddle should continue to melt into the frame and plate as you go. If the weld stops melting to the frame hold you wire closer. Careful not to weld in more then 1″ to 1-1/2″ stitches. Welding to much at once will increase your chances of burn-though and warpage.
It should look like this.

Here is an idea of what your weld should look like form the end profile.

Weld Thickness
Remember, your weld bead only needs to be as thick as the thinest piece you are welding to. If you are welding 3/16″ plate to 1/16″ sheet metal. Your bead only needs to be 1/16″ thick. For more clarity, see the picture below.

Do not fully seam weld anything to the unibody!
Always stitch weld to the unibody. If you seam weld you will increase the chance of failure. Seam welding to think sheet metal, or using to much heat will increase your Heat Affected Zone (HAZ). When welding, the rapid heating and cooling cause the molecules of your base material (plate and frame) to change. This weakens the material and it can become prone to cracking. If you fully seam weld a plate to the frame then the entire area around your weld will be very brittle and could tear right off. Whether it is a backing plate of a suspension mount, a failure can cause a very unwanted trail break down.
Here are a few examples of how to weld a plate on correctly.


Common Problems & fixes
Burn-Through: When welding to thin sheet metal, a very common problem is being to hot and burning right through the material. In the event this happens while welding the unibody, their is not much you can do to make a proper repair. The best thing I have found is to stop welding immediately and let the affected area cool. Then a couple of minutes later come back and using a spot weld technique fill the hole, grind smooth with a grinder, then start your weld where you left off.
Spattering (spitting): If this is happening then you have not properly prepared your welding surfaces. Grind the weld out, clean and degrease the area, and restart your weld. If you have already welded the plate / bracket to the unibody and it is hot, let it cool before you degrease. You do not want to burn your house down, or your self for that matter.
Porosity: I see this time and time again. It is when your weld bubbles, and is full of holes. This is cause by one of two things. Improper preparation of your welding surfaces, or you forgot to turn the gas on before you started to weld. If you did not prepare the surface correctly, see above (Spattering). If you forgot to turn your gas on, Grind the weld off and restart.
The 1.6 L 3 cylinder turbocharged EcoBoost engine is an upcoming design in a number of Ford vehicles wearing the Read more
Common Ford power steering issues Ford power steering pump with reservoir. The power steering system commonly found on most Ford Read more
The Ford MTX-75 (Manual TransaXle), is a 5-speed transmission developed by Ford Motor Company for its larger engined front wheel drive models. "75" refers to Read more
This page contains some modifications that were done to a Ford Windstar with a 3.8 Ford Essex engine for amusement. Read more
Written by Kraqa (Kris)