Fender rolling
Last Updated on July 22, 2024 by Mutiara
Fender rolling is a process in which one makes more clearance in the fender arches of a vehicle. Typically this process allows for the use of wider/taller tires without the rubbing that normally comes with wider/taller tires. The following shows a typical fender rolling tool. The tool bolts on to the wheel hub. Spacers are needed in the back if the roller will not rotate enough (the bolts are hitting the parking brake).

For perfect results the paint on the fender needs to be heated up. If the paint is not heated it is sure to crack when pressure is applied to the metal, this will result in a sure trip to the local paint shop. A heat gun should be used as it is the best and most efficient way of heating the paint. A nice little accessory to the heat gun is a laser pointed thermometer. The thermometer will ensure that one is at the correct temperature of 125-140 degrees F for the fender rolling process to proceed. If a thermometer is not available, the heat of the paint can be described as the temperature of a dark car on a hot summer day. Remember to check the heat of the paint regularly, if the temperature drops it will result in cracking.


Align the roller so that the rubber roller contacts the fender where the lip is protruding. Make sure that the angle of the roller will bend the whole lip and not just curve the edge in. To receive a constant roll on the entire length of the fender one will have to make constant adjustments, adjust for correct length, angle, and pressure along the curve. The handle with the two black balls on it adjust for pressure on the fender. The silver knob on the right side of the roller is for adjusting the length of the arm. The black handle on the left side adjusts the angle of the roller mechanism. Once everything is adjusted to the proper settings, the rolling can begin. Roll in small increments pushing the fender lip in about 2-3 mm at a time, this will ensure that the fender and paint will have time to rest between rolling. The following image illustrates the proper positioning of the roller, and the way in which the roller is moved.


In the following picture one can see how the angle of the roller has to be adjusted so that it remains in proper contact with the fender lip, if proper contact is not maintained the lip will become deformed, resulting in a bad job.

This next image illustrates how the roller has to be adjusted for length. If the length is too short the roller may slip off possibly hurting the operator or the fender, if the length is too long the roller may damage the inside of the fender resulting in protrusions that may be visible from the outside of the car (not good and hard to fix).

Keep an eye on the position of the roller at all times during the rolling process, this will ensure that no mistakes are made. If one can not see the position of the roller ones fingers can be used to measure the gaps between the roller and the fender lip, and between the fender lip and the fender. By the end of the rolling process the gap between the fender and lip should be gone, thus making for the most possible room.
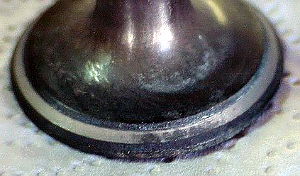
One can see how flat the fender lip is after rolling. There is no longer any lip on the fender (the black mark is where the paint was rubbed of, before the fenders were rolled).

As one can see the fenders were flared to create more room. The stock fender on the left shows how the fender slants towards the car, the rolled fender on the right no longer slants towards the car, it is now vertical.

The 1.6 L 3 cylinder turbocharged EcoBoost engine is an upcoming design in a number of Ford vehicles wearing the Read more
Common Ford power steering issues Ford power steering pump with reservoir. The power steering system commonly found on most Ford Read more
The Ford MTX-75 (Manual TransaXle), is a 5-speed transmission developed by Ford Motor Company for its larger engined front wheel drive models. "75" refers to Read more
This page contains some modifications that were done to a Ford Windstar with a 3.8 Ford Essex engine for amusement. Read more
Pictures and article courtesy of Tom at tom.actionfit.com.